

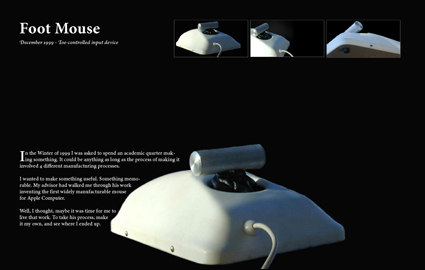
12/1999 Foot Mouse: Toe-controlled Input Device
Stanford University Product Design Project
In the Winter of 1999 I was asked to spend an academic quarter making something. It could be anything as long as the process of making it involved 4 different manufacturing processes. I wanted to make something useful. Something memorable. My advisor had walked me through his work inventing the first widely manufacturable mouse for Apple Computer. Well, I thought, maybe it was time for me to live that work. To take his process, make it my own, and see where I ended up.
The foot mouse is a fully functional toe-controlled input device. The working model was presented to and used by those that attended the Stanford University Manufacturing and Design presentation in Autumn 1999.
The mouse is made of white styrene, brushed aluminum, blue vinyl and steel. Hardware is driven by potentiometers. Software drivers are designed for Windows and map key clicks to the keyboard.
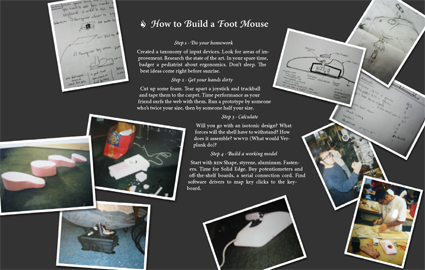
How to Build a Foot Mouse
Step 1 · Do your homework. Created a taxonomy of input devices. Look for areas of improvement. Research the state of the art. In your spare time, badger a pediatrist about ergonomics. Don't sleep. The best ideas come right before sunrise.
Step 2 · Get your hands dirty. Cut up some foam. Tear apart a joystick and trackball and tape them to the carpet. Time performance as your friend surfs the web with them. Run a prototype by someone who's twice your size, then by someone half your size.
Step 3 · Calculate. Will you go with an isotonic design? What forces will the shell have to withstand? How does it assemble? WWVD (What would Verplank do)?
Step 4 · Build a working modelStart with REN Shape, styrene, aluminum. Fasteners. Time for Solid Edge. Buy potentiometers and off-the-shelf boards, a serial connection cord. Find software drivers to map key clicks to the keyboard.
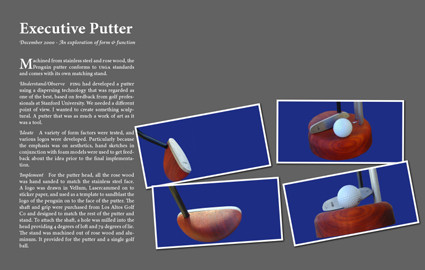
12/2000 Executive Putter: An Exploration of Form & Function
Stanford University Product Design Project
Machined from stainless steel and rose wood, the Penguin putter conforms to USGA standards and comes with its own matching stand.
Understand/Observe
PING had developed a putter using a dispersing technology that was regarded as one of the best, based on feedback from golf professionals at Stanford University. We needed a different point of view. I wanted to create something sculptural. A putter that was as much a work of art as it was a tool.
Ideate
A variety of form factors were tested, and various logos were developed. Particularly because the emphasis was on aesthetics, hand sketches in conjunction with foam models were used to get feedback about the idea prior to the final implementation.
Implement
For the putter head, all the rose wood was hand sanded to match the stainless steel face. A logo was drawn in Vellum, Lasercammed on to sticker paper, and used as a template to sandblast the logo of the penguin on to the face of the putter. The shaft and grip were purchased from Los Altos Golf Co and designed to match the rest of the putter and stand. To attach the shaft, a hole was milled into the head providing 4 degrees of loft and 79 degrees of lie. The stand was machined out of rose wood and aluminum. It provided for the putter and a single golf ball.
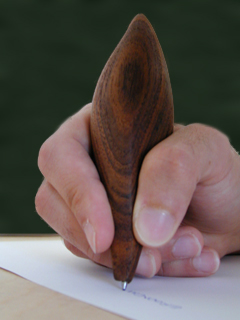
01/2001 Ergonomic Pen
Stanford University Product Design Project
A pen hand carved out of imported teak to be elegant while ergonomic. Hand carving teak is a lot of fun. The grain is tight and it's not too soft and not too hard.
Recent Work
The design team at Adobe has recently grown to a non-trivially large size (around 70 or 80 people) across 4 continents. One change that came about as a result was that all the designers in headquarters moved to the same floor in the East Tower of the San Jose headquarters. This required me to move from my last spot which was in the West Tower with the Photoshop Album and Illustrator teams.
As part of the move, I decided to completely gut my office of all the standard furniture and start from scratch (this is something I've wanted to do with our software for a long time, but that's another issue). Starting from scratch I was able to add only the elements that I thought were essential. I cut the noise. I also wanted to build all the furniture from scratch so that everything was custom and built for the room. I'll post pictures soon. The problem is that the office is small, so it's hard to take a picture that captures the space without a fish eye lens (I'll need to borrow one of those).